
Want to make your photos stand out with a cool blur effect? You’re in the right place.
Adding blur to your images can instantly give them a professional touch, highlight your subject, or create a dreamy vibe. If you’ve ever wondered how to do this easily and quickly, Canva is the perfect tool for you. In this post, you’ll learn simple steps to add blur to your photos using Canva—no complicated software or skills needed.
Keep reading, and you’ll be creating stunning blurred images in minutes!
Add Blur Using Canva Tools
Adding blur to a photo can create a soft, dreamy effect. It helps focus attention on key parts of the image. Canva offers easy tools to add blur quickly. No need for complex software or skills.
This guide shows how to add blur using Canva’s tools. Follow simple steps to make your photo look smooth and stylish.
Access The Canva Editor
First, open Canva in your web browser or app. Log in to your account or create one for free. Click the “Create a design” button. Choose the design size or template you want. This opens the Canva editor where you can edit photos.
Upload Your Photo
On the left menu, find the “Uploads” tab. Click the “Upload media” button. Select your photo from your device. Wait a few seconds for it to upload. Drag the photo onto your design canvas.
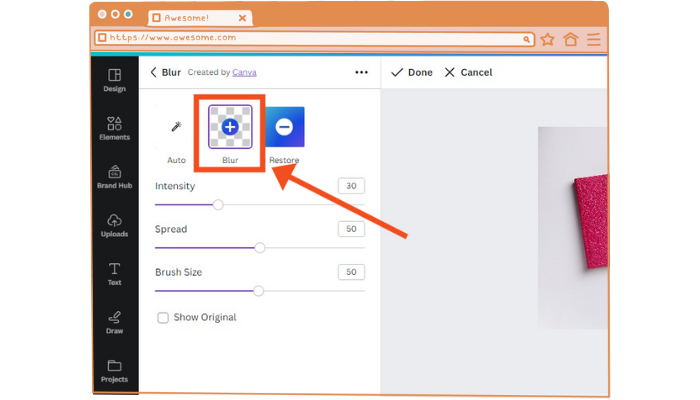
Locate The Blur Effect
Select the photo by clicking it. Look for the “Edit image” option above the canvas. Click it to open image filters and effects. Scroll to find the “Blur” tool in the list. It may be under “Adjust” or “Effects.”
Apply And Adjust Blur
Click on the Blur tool to apply it. Use the slider to increase or decrease the blur level. Move it slowly to see the changes. Stop when you get the right softness. You can also combine blur with other effects for style.
Credit: mockey.ai
Using Canva Filters For Blur
Using Canva filters to add blur is simple and effective. These filters help create soft focus effects that enhance your photos. Blur can make the subject stand out or give a dreamy look. Canva offers various blur filters that you can easily apply and adjust.
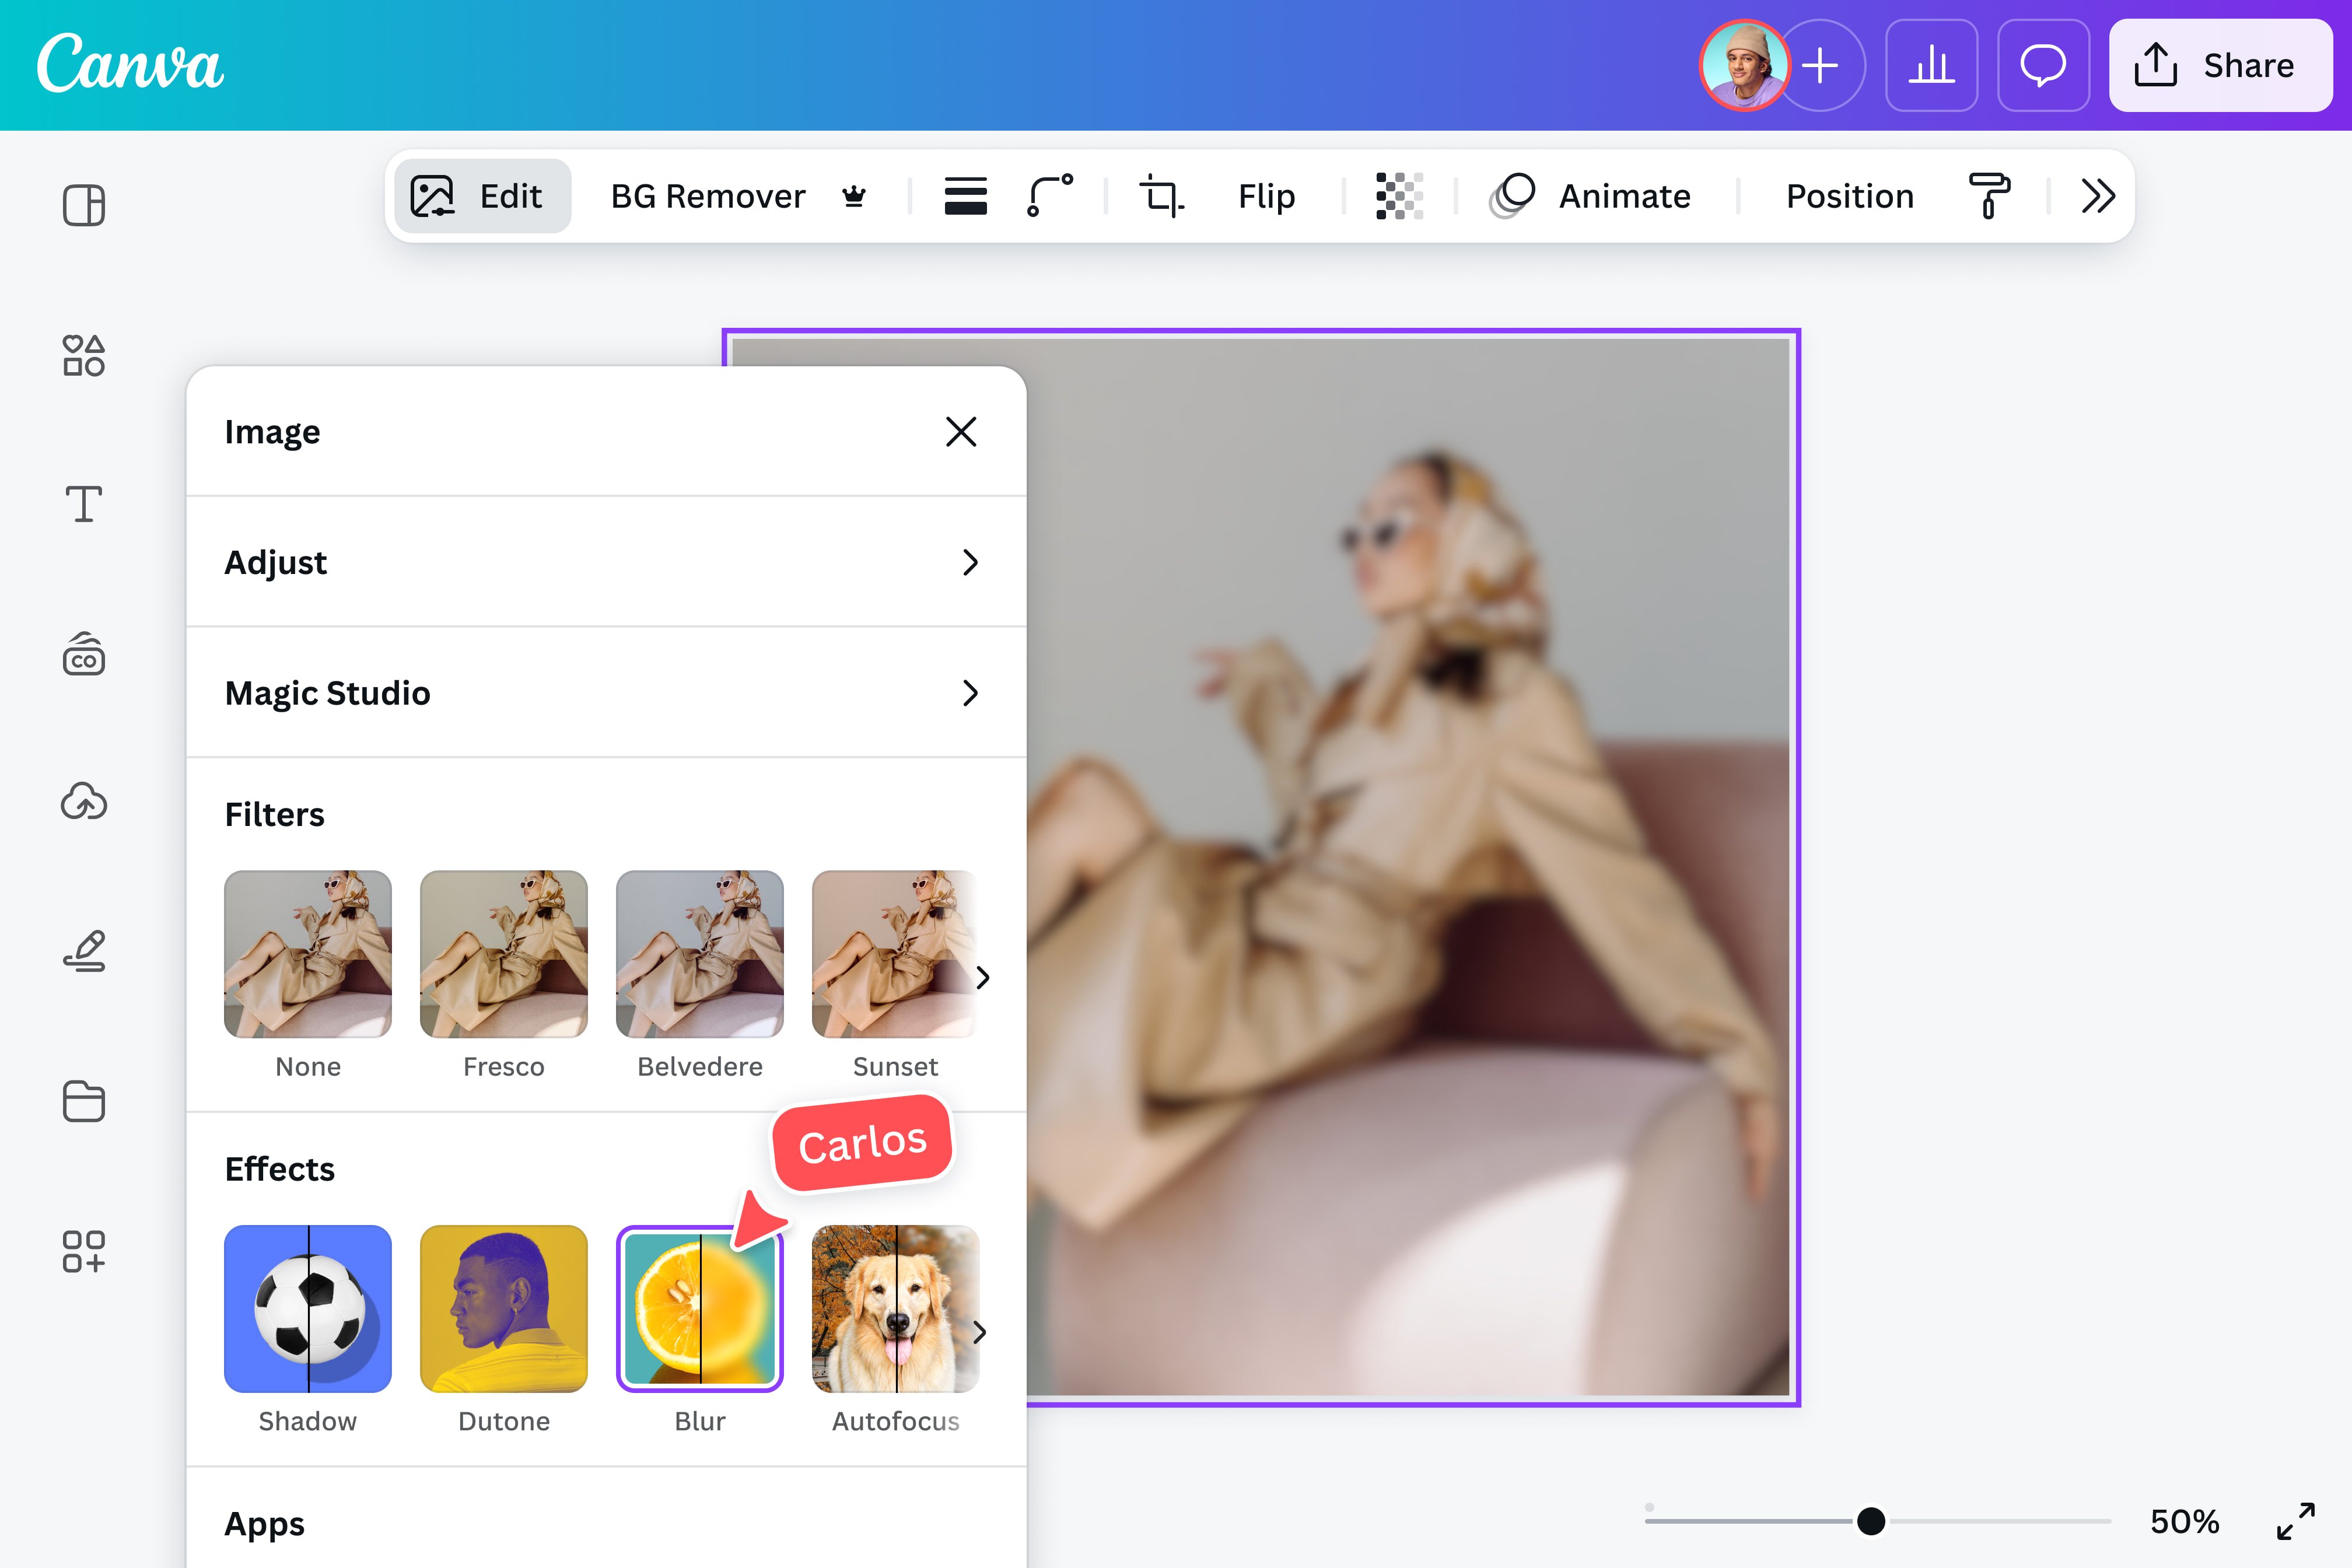
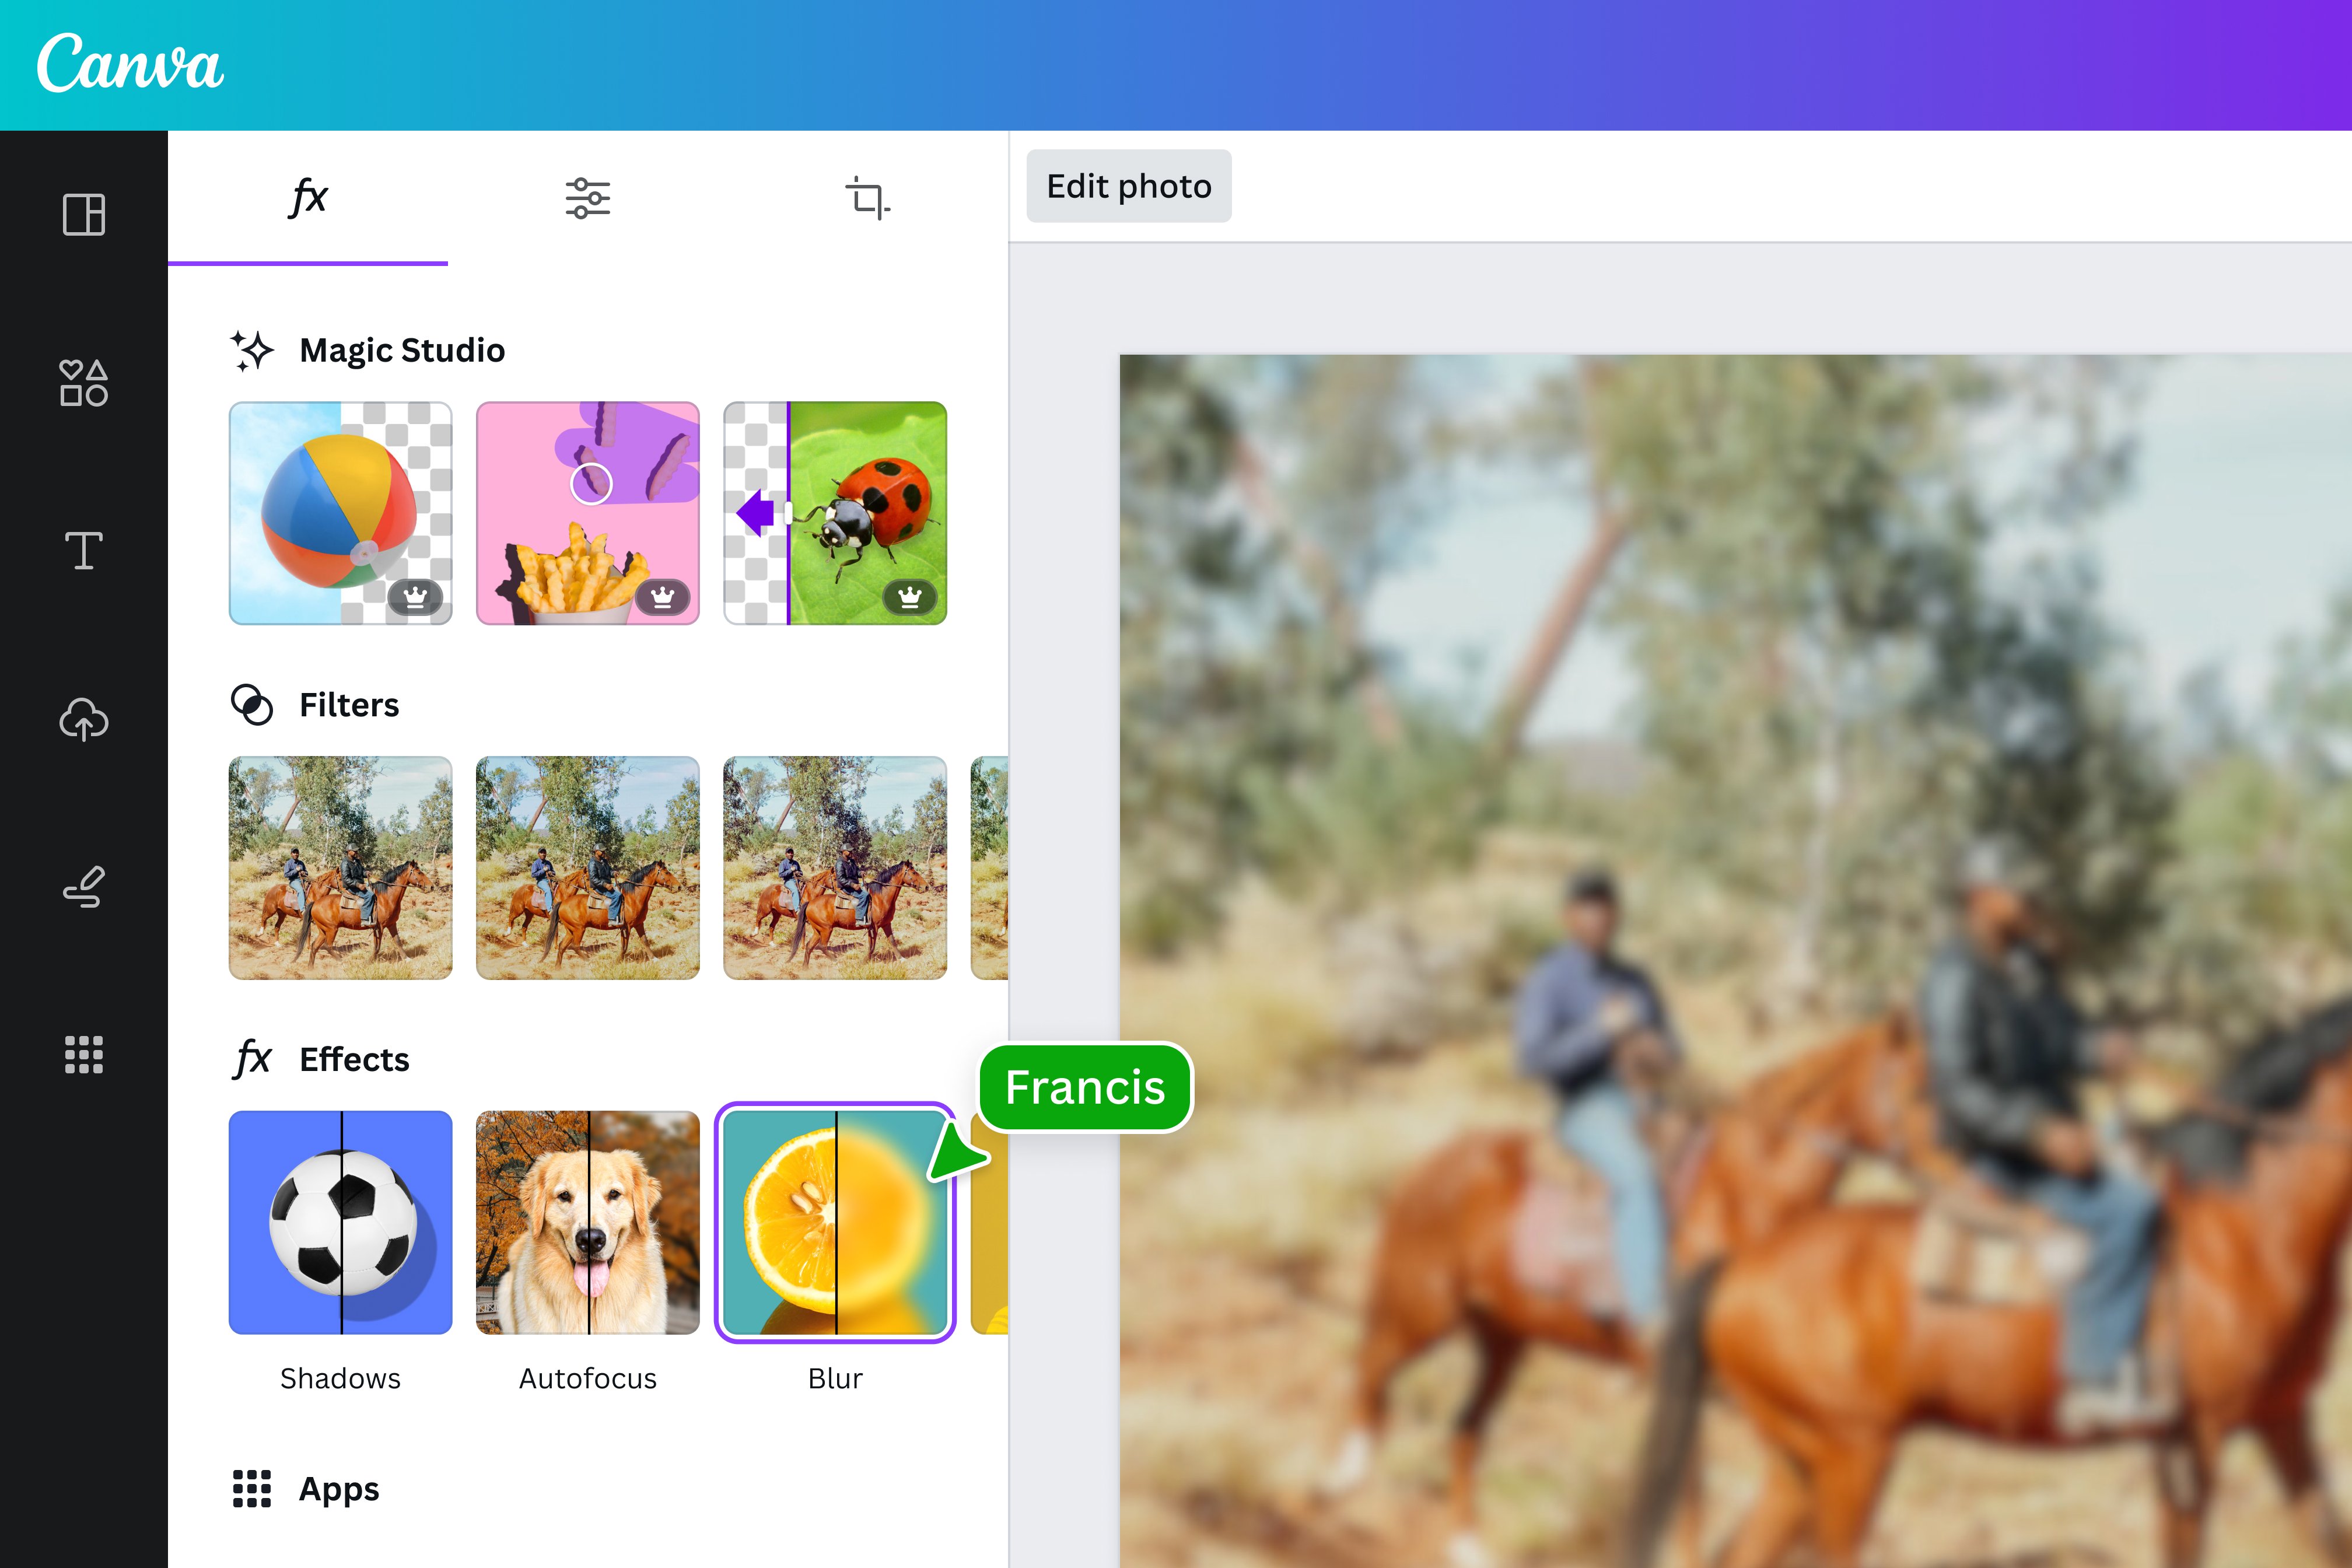
Select A Filter With Blur
Start by uploading your photo to Canva. Click on the image to open editing options. Find the “Filter” menu in the toolbar. Scroll through the filters until you find one that adds blur. Choose a filter that suits your style. The blur effect will apply immediately to your photo.
Customize Filter Intensity
After selecting a blur filter, adjust its strength. Use the slider to increase or decrease the blur level. This control helps you get the perfect look. A subtle blur can soften the background, while a stronger blur hides details. Keep changing the intensity until you are happy with the result.
Creative Blur Techniques
Creative blur techniques help make photos more interesting. They guide the viewer’s eye and highlight important parts. Using blur in Canva is simple and adds a professional touch. Try different blur styles to see what fits your photo best.
Blur effects can change the mood of a picture. They soften harsh lines and create depth. Experimenting with blur lets you control focus and style easily.
Blur Background For Focus
Blurring the background makes the main subject stand out. It removes distractions and draws attention to what matters. In Canva, you can duplicate your photo and blur the bottom layer. Keep the top layer sharp for clear focus.
This method works well for portraits and product images. It creates a smooth, professional look with minimal effort.
Blur Specific Photo Areas
Sometimes only a part of the photo needs blur. Canva allows masking to blur selected areas. Use shapes or frames to cover parts you want blurred. This technique highlights other photo sections clearly.
Selective blur adds creativity and guides the viewer’s eyes. It also hides unwanted details without cropping the image.
Combine Blur With Other Effects
Blur pairs well with effects like brightness or color filters. Adjusting these can enhance the mood of your photo. Blur softens the image while filters add style or tone.
Layering effects in Canva offers unique and artistic results. Play with different combinations to find the right balance.
Blur Tips For Stunning Results
Adding blur to photos in Canva can create a soft, artistic look. It helps to focus attention and add depth. Using blur wisely makes your images look professional and clear.
Below are key tips to get stunning results with blur in Canva.
Balance Blur And Clarity
Keep the main subject sharp while blurring the background. This contrast draws the eye to important parts of the photo. Avoid blurring the whole image, or it may look messy.
Use just enough blur to soften distractions. Adjust the intensity until the image feels natural and balanced.
Use Blur To Highlight Text
Blur the photo behind text to make words stand out. This technique improves readability and focus. A blurred background prevents the text from blending with busy details.
Choose a subtle blur effect to keep the photo visible but not overpowering.
Avoid Overusing Blur
Too much blur makes photos unclear and confusing. It can ruin the image quality and reduce impact. Use blur only where it adds value to your design.
Test different blur levels and stop before the image loses its meaning or sharpness.
Troubleshooting Blur Issues
Adding blur to photos in Canva is simple. Sometimes, the blur effect may not work as expected. This section helps fix common blur issues. Follow these tips to improve your experience.
Blur Not Showing Correctly
Check if the photo is selected before applying blur. Blur works only on images, not on shapes or text. Make sure you use the latest Canva version. Refresh the page to fix small glitches. Clear your browser cache if blur still fails. Try uploading the photo again if the problem persists.
Slow Performance Fixes
Blur effects can slow down Canva on weak devices. Close unused tabs and apps to free memory. Reduce the size of your image before uploading. Use a stable internet connection for smoother performance. Lower screen resolution may help Canva run faster. Restart your device if Canva is very slow.
Credit: www.canva.com
Credit: www.canva.com
Frequently Asked Questions
How Do I Blur A Photo In Canva?
To blur a photo in Canva, select your image, click “Edit Image,” then choose the “Blur” option. Adjust the slider to set the blur intensity until you achieve the desired effect.
Can I Blur Only Part Of An Image In Canva?
Yes, use Canva’s “Effects” tool with masking features or overlay a blurred shape. This allows selective blurring on specific image areas.
Is Canva Free For Adding Blur Effects?
Yes, Canva offers a free blur tool for basic photo editing. Some advanced blur effects might require Canva Pro subscription.
Can I Adjust Blur Intensity On Canva Photos?
Absolutely! After selecting the blur effect, use the slider to increase or decrease the blur strength to fit your design needs.
Conclusion
Adding blur to photos in Canva is simple and quick. You can highlight important parts by softening the background. This effect helps your images look professional and clear. With just a few clicks, anyone can edit photos easily. Try different blur levels to find what fits best.
Practice often to improve your design skills. Canva makes photo editing fun and accessible for all. Keep experimenting and enjoy creating beautiful images.


